How to Remove the Oppo Account Using JTAG Plus
Here’s a general step-by-step overview of how this process might work. Note that this is a high-level guide—specific details may vary depending on the JTAG Plus tool and the Oppo Find X’s hardware.
Preparation
- Tools Needed: You’ll need a JTAG-compatible tool (e.g., EasyJTAG Plus Box), soldering equipment, and the correct software for your setup.
- ISP Pinout: Research the In-System Programming (ISP) pinout for the Oppo Find X. These are specific points on the motherboard that allow direct access to the device’s memory (eMMC or UFS).
Connecting the Device
- Open the Oppo Find X to access its motherboard.
- Locate the ISP pinout points (e.g., CLK, DO, CMD, GND) and carefully solder wires to these pins.
- Connect the wires to the JTAG Plus Box and power the device (via USB or an external source, as the battery may not be used in this mode).
OPPO FIND X Remove Oppo Account Via jtag plus
1– backup the FULL DUMP of the memory in addition to the memory partition file CHIP CONFIG
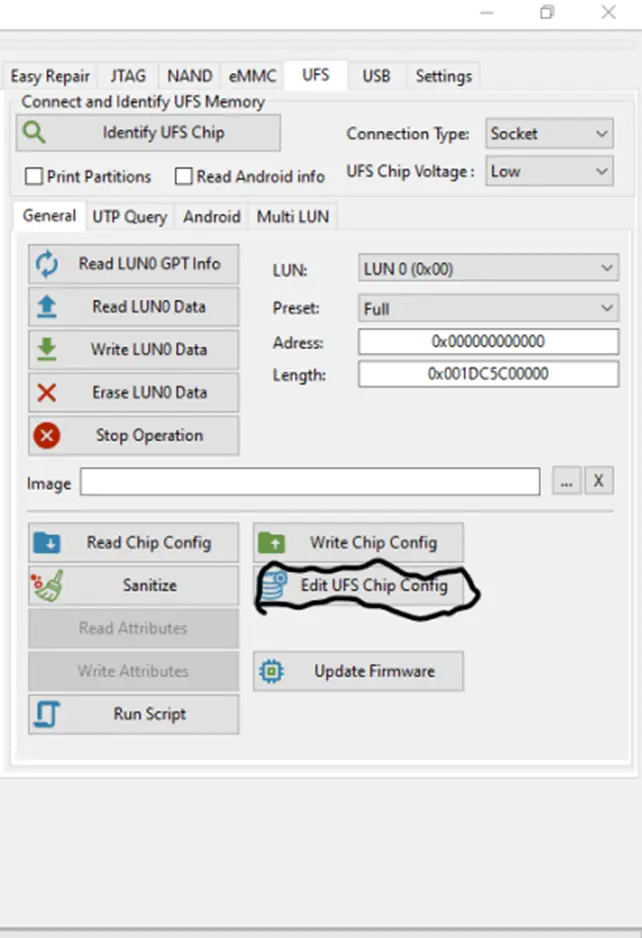
2– After make sure that DAMP is completely backed up out of the memory, we are now going to perform the RESET UFS operation in order to completely remove the OPPO account,go to the EDIT UFS CHIP CONFIG box, like the image below
3–
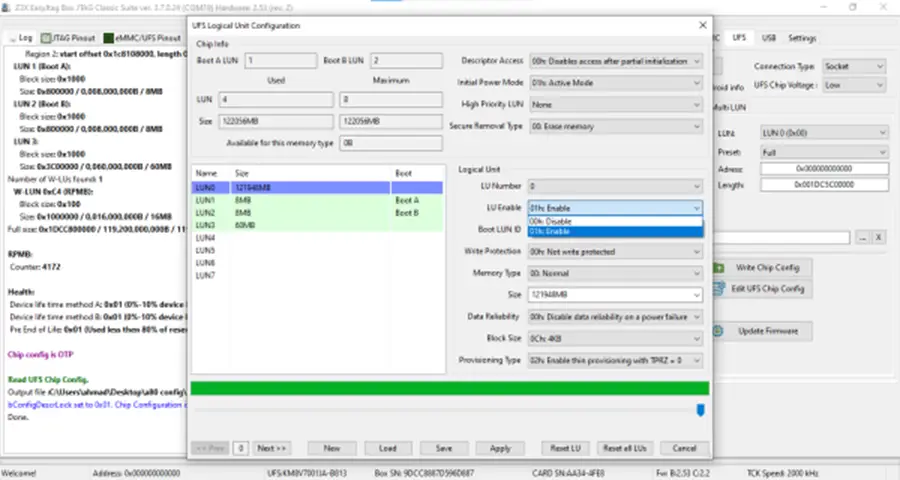

As in the image above, we notice the presence of LU ENEBALE enable, we convert it to disable, as in the image above, we notice the presence of LU ENEBALE enable, we convert it to disable for all luns in order and when finished we click on apply
4– Here we cleared the memory completely, and after completion, we return the chip config file that we pulled in order to restore the luns in order as they were before, and now we return the dump that was pulled from the memory before the reset ufs process,To download a dump file for the oppo find x from here
5– install the memory
The only solution is to upgrade the memory and connect it via the BGA153 UFS adapter ,If an adapter is not available to read the memory, the BGA153 UFS adapter is not available
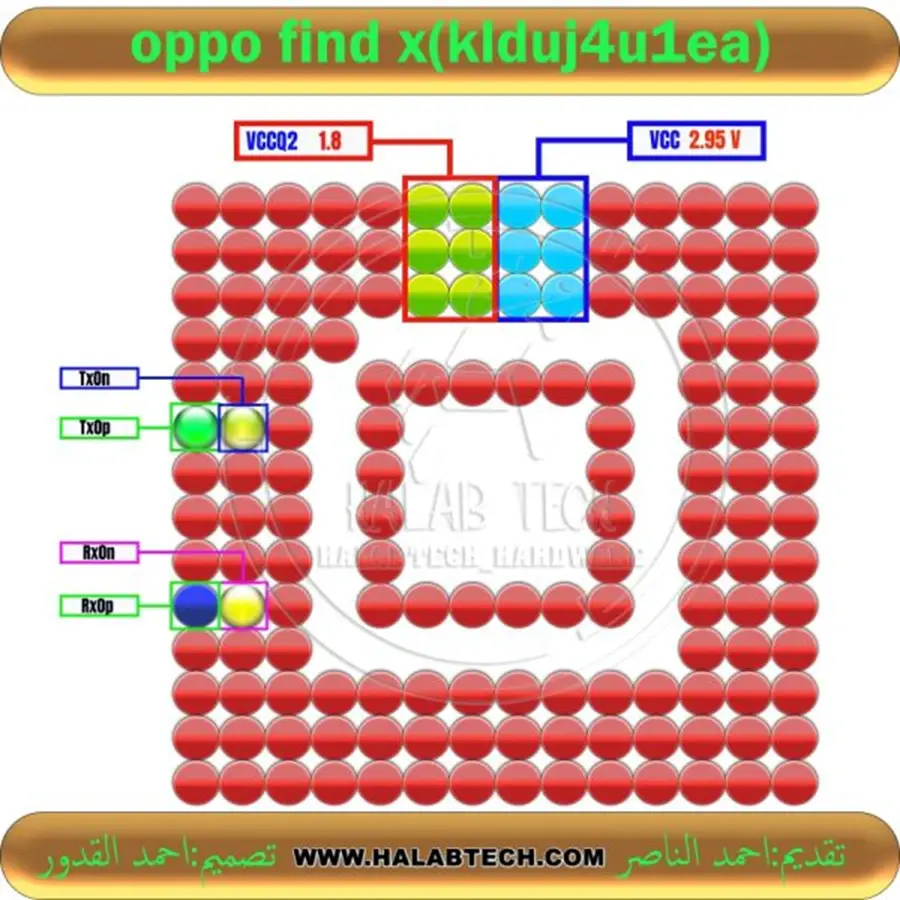
So I raised the memory and pulled 4 lines from the bottom of the memory and connected it via an isp adapter,To know the points of TXN TXP RXN RXP I will put a picture of the memory here